Sunday, July 15, 2012

Stuffed Chops

Gordon Ramsey would have approved of this meal.  It was so so good.  If we had more pork chops I would probably do it again next week.  It is essential to have a good sharp knife that has teeth.  


What you need:

Pork Chops  (most of the time you use a double chop to when stuffing, but we used single chops and it worked just fine.  A double chop is the thickness of two regular size chops.)  

Bacon
Smoked Gouda cheese
salt 
pepper

1)     Make sure your pork is completely thawed before beginning.
2)     Using your very sharp knife make a pocket in the side of the chop, the fatty side.  To do this insert your knife into the fatty side and keeping the insertion as small as possible wiggle your knife until you have a nice sized pocket.
3)  Crisp some bacon in a large frying pan.  Do not throw away the grease!
4)  Break the bacon into small enough pieces the get them into through the hole in the chop.  
5)  Stuff as much bacon and cheese as you want into the chop.
6) Over medium heat seer each side of the chop in the bacon fat.  About 2 minutes each side or until it has nice color.  reduce heat to medium low, cover and cook for about 5 minutes on each side. Let the pork rest for 3 minutes before cutting.  Cutting it to soon will cause all the juices to run out.


     Garlic Mashed potatoes

Potatoes
Garlic
sour creme
butter
milk
salt
pepper

1)  You can do this two ways.  Depending on the garlic you have.
       a)    If you have fresh garlic just toss 3 or 4 cloves into the boiling water with your cubed potatoes and mash it up like normal.

      b)  If you have pre-minced garlic.  Prepare potatoes like normal and just add about 2 Tbs of garlic during the mashing process.

2) add butter, milk and sour creme, salt and pepper until it is smooth and delicious.
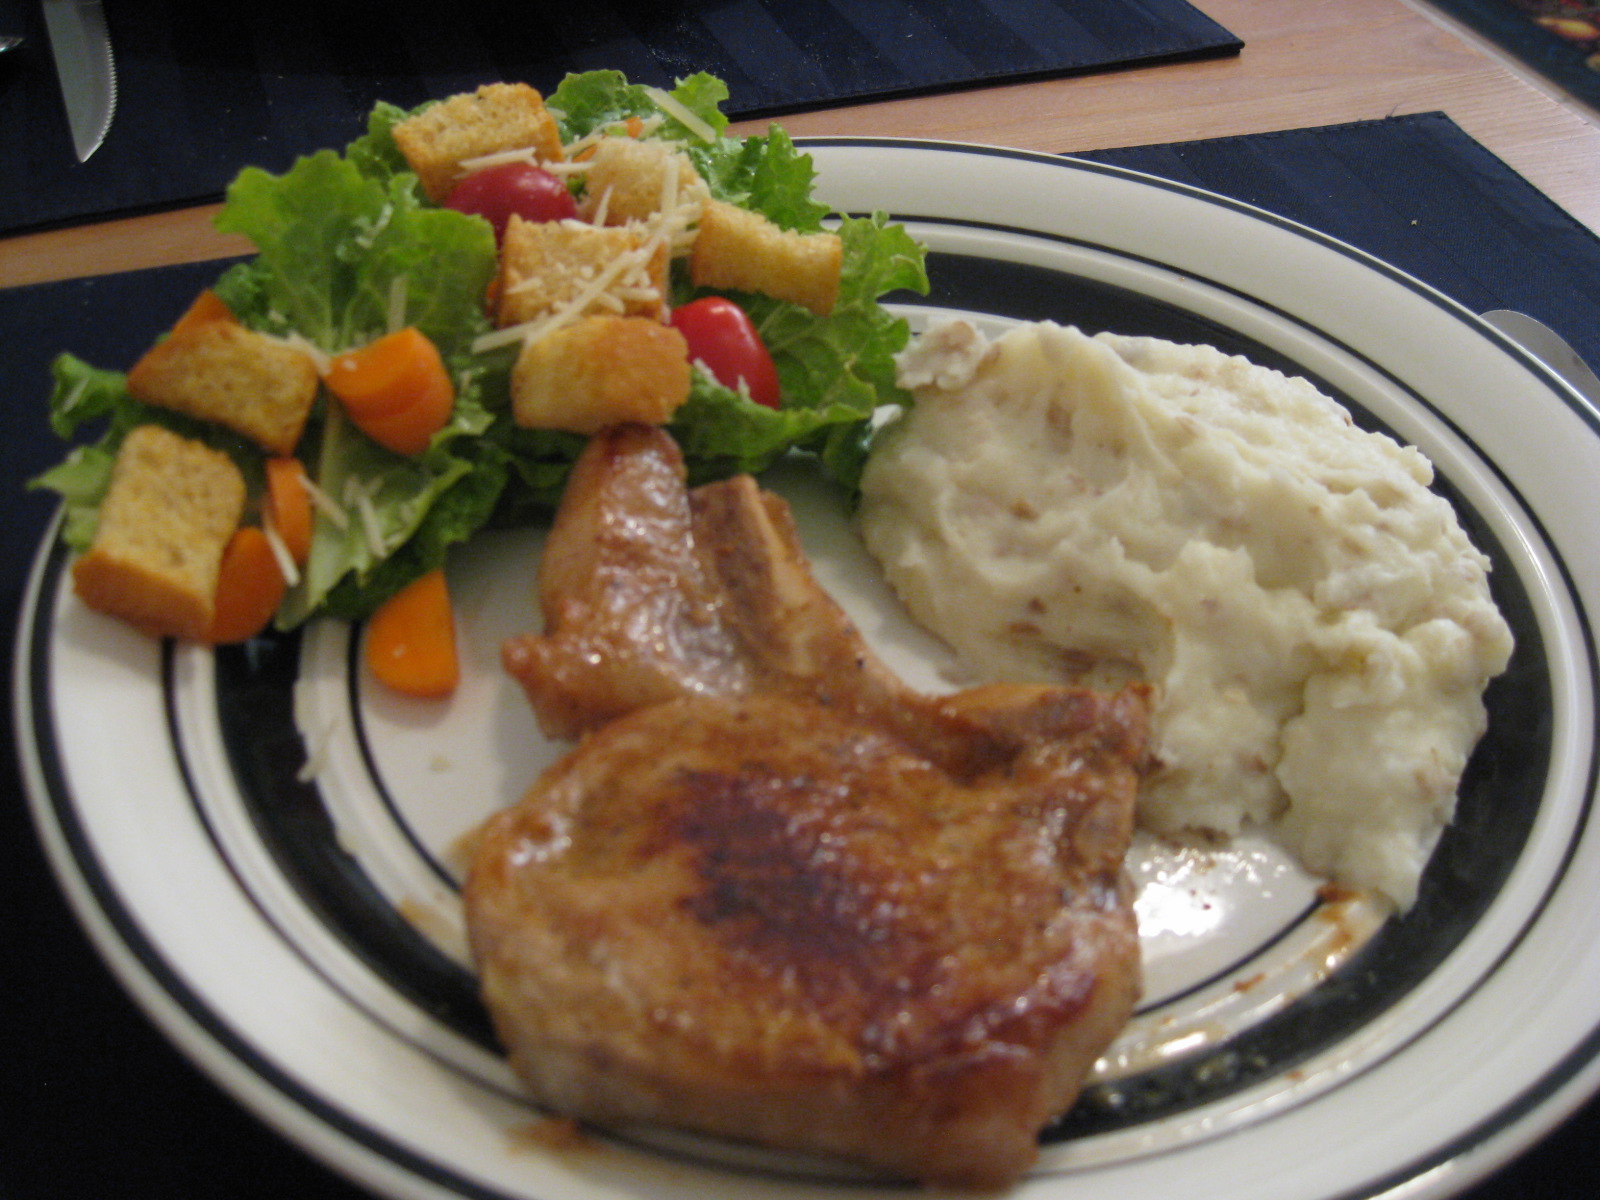


Enjoy!!!


Sunday, June 10, 2012

Carmel Corn

In my home growing up we would always have caramel corn and watch the firework on the 4th of July.  We didn't do it very often besides that so it brings back special memories for me.  Recently our good friends moved back to Pennsylvania for school and we made them a treat bag to eat along the way.  It is a long drive and a good supply of sugar is needs. Caramel corn definitely satisfies that need. 
(A candy thermometer is recommended but not necessary)


What you need:
5 Quarts popped corn
2 C brown sugar (remember brown sugar is to be packed when measuring)
1/2 C light corn syrup
1/2 c butter
salted peanuts

What to do:

Combine sugar, butter and corn syrup in a sauce pan.  Cook and stir over medium heat until sugar dissolves and mixture boils.  Simmer for 5 minutes.  If using a candy thermometer you should cook it to a soft ball.  Remove from heat, pour over popped cor, stirring until all corn is coated.  Add peanuts while stirring caramel mixture if desired.

Beef Tenderloin with Cheese

Big thanks go out to Casey and Kelly for the meat and to Rachel Ray for inspiring this meal.


 We were given a bunch of meat and had no idea what to do with it, so I was searching foodnetwork.com and found a recipe for beef tenderloin with Gorgonzola cheese.   Neither Nikki or I had ever tried gorgonzola chese before so we went to Harmons to check it out.  In case you are wondering,   Authentic Italian Gorgonzola comes in two varieties; Dolce - meaning sweet; and Mountain - the sharper and firmer version. Dating back to ancient times, this member of the stracchino family is one of the world's classic cheeses.Almost spreadable, Gorgonzola Dolce is supple and luxurious with an unmistakable tangy creaminess. Its pale white interior is laced with streaks of blue, giving Gorgonzola Dolce a striking appearance to match its piquant flavor.  (Curtosey of foodnetwork.com)
                                          
If you like bleu cheeses, you might like it, but, we did not enjoy it.  So we were cruising the deli and saw two cheeses that looked promising.  One was a gruyere cheese, which is a type of swiss, and the other was a smoked Gouda cheese.  Both of which we tasted were amazing, so rather than decide between the two we got a little of both, and were ultra glad we did.


Here's how to do it.

Ingredients

Directions

Let meat rest 10 minutes before beginning dinner preparation.
Place a large, flat griddle or skillet over high heat. When hot, using a pair of tongs and a folded paper towel, wipe cooking surface with oil and place steaks on hot pan. Seer the steaks, 2 minutes on each side. Reduce heat to moderate. Season meat with salt and pepper and cook 4 to 5 minutes longer on each side.
Preheat broiler to high.
Arrange steaks on baking sheet. Top each steak with enough cheese to cover the top. Place baking sheet 6 inches from broiler heat just long enough to melt the cheese.  Let meat rest 2 or 3 minutes, then serve immediately.


This was an amazing meal and would make it again with no reservations.  As you can see we at our dinner with some scones.  Real easy, get some frozen uncooked roll dough and thaw it out, smash flat and cook in hot oil.   Top with honey butter. (equal parts honey and butter mixed well.)

Saturday, March 24, 2012

Harmons Meat Sale

For the most part we try and get the lowest price when we go shopping. That being said, you get what you pay for.  We bought some beef at WinCo a couple of weeks ago.... bad experience.  It was dry, huge chunks of fat and chewy.  Chewy meat is almost as bad as dry, burned meat.  However, I was at Harmons last week and they had a sale on their meat, 4 packages of meat for $20.  That may seem a little pricey, but for the quality of meat and the amount you get, it is not a bad deal.  The packages normally sell for 6-8 dollars.  That being said, I picked up some ground beef, a package of boneless pork spare ribs, and 2 NY strip steaks.  You can read about the spare ribs in the posting right before this one.  The steaks... were awesome.  Here is what we did,  cooking is just as much about being creative as knowing what to do.


What you need:
Steak
Butter
Garlic
Salt
Pepper

What to do:
The awesome thing about this is you can make it rich with garlic, or have just a hint.  Melt 2-3 tbs of butter.  Crush or finely chop 2 cloves of garlic, mix it in with the butter.  let this mixture cool before putting it on your steak or it will start to cook it.  When it is cool but not solid, pour it into a plastic bad, with the meat and let it marinate for 1 1/2 -2 hrs.  When you are ready to eat, heat a non stick pan, place you steak in the pan and you should hear a nice sizzle, let your meat cook on the one side until it has a nice seer on it, flip the meat and repeat the process.  The meat may be cooked to your desired temperature, if not, you can put it in the oven until it is done.  We also really like the steak just cooked with a generous amount of salt and pepper.  Enjoy!

Summer is coming

One of my favorite foods to eat in the summer is BBQ pork and corn.  It just screams summer.  With the weather getting warmer, and Nikki still not able to eat dairy, we decided to indulge in this dinner or BBQ spare ribs.  Now, we don't have a grill but the meat was so tender and juicy, I can't wait to eat it again.  One of the best things about this meal is how amazingly fast it is.  We cooked the ribs from frozen in 20 minutes, and they were so amazingly tender and moist.  Behold... the power of a pressure cooker.


What you need:
BBQ spare ribs
seasoning, what ever kind you like
BBQ sauce

What to do:
In the bottom of the pressure cooker add about 1-2 cups of water.  Pressure cookers need liquid to produce steam to create the pressure.  Season your spare ribs generously. We used the BBQ seasoning from McCormick.  Cook at high pressure for 20 minutes if frozen, 15 in thawed.  That's it... you're done.  We like to cover them in BBQ sauce, but if you want to you can just dip them, you can do whatever you like to them.
 

Monday, March 5, 2012

Chicken Noodle Soup

It turns out that our baby doesn't like it so much when Nikki eats dairy, and so, that means we get to find all sorts of foods to eat that don't have dairy.  It is way hard, just so you know.  That being said, this one is going to be worked into our regular routine.  Great for a coldish day, so I probably should have put this up at the beginning of winter, but, better late then never.


What you need:
  1. 3 Chicken Breasts
  2. 10 cups water
  3. 1/2 C. chopped onion
  4. 1/2 tsp black pepper
  5. 3 T salt
  6. 2 bay leafs
  7. 1 C chopped carrot
  8. 1 C chopped celery
  9. 2 cup dried egg noodles. (As you can see we used Fusili Springs for our pasta because we didn't have any egg noodles. You can use what ever pasta you want, egg noodles are best, but the springs were great.  For extra healthy soup, you could use the colored noodles that have tomato and spinach in them.)
  10. 1 tbs dry parsley
  11. 3 cubs chicken bullion (This is our preference.  You can do more or less)
What to do:

       In a six to eight quart pan, mix water, onion, salt, pepper, and bay leaf.  Bring to a boil and add the chicken.  Return to a boil, turn down and boil the chicken until through.      While the chicken is cooking, chop carrots and celery.  (try to cut them as evenly as possible to ensure even cooking)  Remove the chicken from water- DO NOT POUR THE WATER OUT!!!- Cut the meat into bite size pieces and put it back in the water, add bullion and discard the bay leafs.  (If you want to make a game out of it, leave the bay leafs in and who ever finds them gets a prize... like they don't have to do dishes that night.)     Bring the broth back to a boil, stir in carrot and celery, simmer about 10 minutes or until the vegetables are cooked to desired tenderness.
        One of the worst things about any soup is when the pasta is over cooked.  To solve this problem, we cook the noodles in a separate pan in salted water, then just mix them in.  The reason for this is two fold. 1) If the noodles are cooked in the soup they soak up a lot of the broth and then you don't have much left.  We really don't like our soup without broth.  2) If you put the noodles in to soon, either the noodles will be done and the veggies will be crunchy, or the noodles will be over cooked and the veggies just right.  Neither way is so great. 
       This meal is great with corn bread or fresh baked rolls. 

Monday, February 27, 2012

Ultra easy jell-o salad

This jell-o salad is always a hit at our family gatherings.  You can do it with a variety of fruits.  We have have done blackberries, raspberries, and peaches.  Blackberry and Raspberry were the best, peach... not so much.  It would probably be really good with strawberries; we just haven't tried it yet.


What you need:

1 large box of jello
1 small box of vanilla cook and serve pudding
8 oz whipping cream (one container of cool whip)
1 package of the same fruit as your jell-o
3 cups water.

What to do:

Combine 3 cups cold water with the jello and the cook and serve pudding.  Mix well.  Bring to a boil, reduce to a simmer and cook for 10 minutes.  Be careful, it can boil over very easily.  Pour mixture into a mixing bowl and chill until it is firm.  Using an electric mixer, beat the jell-o until there are not large chunks.  Fold in the whipping cream and then fold in the fruit.  That's it.  Enjoy!

Saturday, February 18, 2012

Chicken Pot Pie

 This is one of my favorite meals.  It is another one that is somewhat involved, but you can cut down on the last minute preparation by making the pie crust in advance and storing it in the refrigerator or in the freezer.  This is the same pie crust that is referred to in the Apple Pie post.

Foolproof Pie Crust


  1. 4 C Flour                                                 
  2. 1 T while granulated Sugar
  3. 2 t Salt
  4. 1 3/4 C shortening
  5. 1 T white vinegar
  6. 1/2 C cold water
  7. 1 egg

What to do:

With a fork or pastry blender, mix together flour, shortening, salt and sugar.  In a separate dish, beat egg, vinegar, and water.  Add liquid mixture to dry ingredients stirring with fork  until all are moistened.  Using your clean hands, mold dough into a ball. Wrap tightly in plastic and chill at least 15 minutes.  Dough can be left in refrigerator for up to 5 days.


Pie Filling:
1- 10oz pkg frozen peas and carrots
1/2 C chopped onion
1/4 C buter
1/3 C Flour
1/2 t salt
1/4 tsp sage
1/8 test pepper
2 C Water
3/4 c milk
3 Cubes chicken bullion
3 C cubed chicken

What to do:
Cook peas and carrots. (Be very careful.  This will cook in the oven for a while, so if you cook them to the right doneness, they will be over done at the end.)  In a saucepan cook onion in butter until tender, not brown.  make a roux, by adding flour, mix well until all the flour is fully incorporated, then add salt, sage and pepper.  mix well.  Dissolve the chicken bullion in water, add milk, then add to the roux all at once. Cook and stir regularly until thickened and bubbly.  Stir in drained, cooked vegetables, and chicken.  Continue to cook until it is all hot.  Roll out pie crust into a pie dish, pour pot pie filling into the bottom pie crust.  Roll out second pie crust, layer on top and crimp edges together tightly.  Poke 5-10 holes in the top crust to allow ventilation.  Cook at 375 or 400 for 20-30 minutes or until top is golden brown.  If the edges are to browning to fast, place a ring of tin foil over just the edges.    Bon Appetit!

Stove Top tin foil dinner

We love tin foil dinners, but, we did not like the bacon was never crispy and the vegetables were unevenly cooked.  So to solve this problem we did it on the stove, which may make a few more dishes but is so good!

Ingredients:

1/2 lb ground beef
3 medium potatoes
1/2 lb bacon
onion
carrots
butter
cheese (optional)

What to do:
The ingredients should be cooked in this order for optimum flavor and doneness.   In a medium skillet cook bacon.  While the bacon is cooking, Melt 1 Tbs of butter in a second skillet, add onion and cook till tender. wash and cut potatoes into cubes.  cut carrots into small pieces. Once the onion is tender start cooking the carrot for about 4-5 minutes, then add the potatoes, season generously with salt and pepper.  Cover with lid.  ( don't forget about the bacon, you should flip it)  While all that is cooking.  separate the meat into 8 equal chunks. flatten the meat and put a cube of cheese in it. season the meat with your favorite seasoning, wrap the meat around the cheese and pack it tightly.  remember to stir the vegetables.  When nice and crispy take the bacon out, set on a plate with a paper towel under it, and pour out some of the fat.  Cook the meatballs in the bacon fat for extra flavor.  These need near constant attention, so that they don't burn.  Rotate them once one side is brown. Chop up the bacon into small pieces.  When everything is done, mix it all in one skillet, add some salt and pepper to taste.  Dig in!


Friday, February 17, 2012

Chicken Parmesean

When we go out to dinner, it is a rare occurrence that Nikki doesn't order chicken parmesean.  So, one day we found a recipe for it, and it was just as good, if not better than a restaurant.  This one does take a little time, so be prepared.

Ingredients:
  1. 1 small onion
  2. 1 clove garlic
  3. 1 tbs butter
  4. 1 14.5 oz can of crushed tomatoes
  5. 1/2 tsp sugar
  6. 1/8 tsp salt
  7. dash of black pepper
  8. little bit of basil
  9. 2 boneless, skinless chicken breasts
  10. 1 cup bread crumbs or 3 cups croutons ( put in food processor until real small)
  11. parmesean cheese
  12. 1/2 oregano
  13. 1 egg
  14. 2 T milk
  15. cooking oil
  16. mozzarella cheese
In a medium sacue pan cook onion, garlic and butter until tender.  carefully stir in tomatoes, sugar, salt and pepper.  Bring to a boil, reduce heat, and simmer utill desired consistency.  add basil right before serving.

Chicken:
While sauce is simmering, place each chicken breast half between to pieces of plastic wrap.  Using a hard object, like the side of a hammer or meat mallet,  pound the chicken lightly until it is about 1/4 inch thick, remove plastic wrap.  In a shallow dish, stir together bread crumbs/ crushed croutons, 3 tbs parmesean cheese, and the oregano.  ( you can omit the oregano if using croutons.)  In a second dish stir together egg and milk.  Dip chicken in egg mixture, then into the bread crumbs.  Pack the breading tightly.

In a large skilled cook the chicken in hot oil over medium heat for 2-3 minutes per side or until golden.

Spoon sauce over chicken, and top with mozzarella cheese.  This is great when served with pasta.  Enjoy!!!

Pepper Steaks

This one is best done in a pressure cooker, but can be done without.  The advantage of a pressure cooker is you can use a lower quality of beef and the pressure cooker makes them super tender.

Ingredients:

  1. 1 lb beef cubs
  2. 1 T paprika
  3. 1/4 t garlic powder
  4. 1 can beef broth or 2 cubes beef bullion
  5. 2 cups water
  6. 2 large green bell peppers
  7. 2 small or 1 large tomato
  8. 1/2 soy sauce
  9. corn starch
  10. 2 C uncooked white rice. 
Pressure Cooker:

Cook white rice according to directions on package.  If you are using instant rice, wait until the end.  Place the meat, frozen or thawed, in the pressure cooker and sprinkle with paprika and garlic powder.  Add one cup water and cook at high pressure for 10 minutes.  Release pressure, add beef bullion that has been mixed with 1 cup of water and sliced peppers.  Bring back up to high pressure for 8-10 minutes.  Release pressure, and add soy sauce and cut tomatoes.   Boil for 5-7 minutes.  mix cornstarch and water, and while stirring the pot, slowly pour in cornstarch until it is at desired thickness.       Serve over white rice.

Non-Pressure Cooker:

Cut steaks into smaller chucks or strips.  Sprinkle paprika and garlic powder on meat.  Brown the steak.  Pour in beef broth or beef bullion (dissolved in water), green peppers that have been cut into strips.  Cook about 1/2 hour or until meat is tender.  Add soy sauce, and 1/2 cup water and return to boil.    mix cornstarch and water, and while stirring the pot, slowly pour in cornstarch until it is at desired thickness. Add tomato chunks and cook until the tomatoes are heated thoroughly.  Serve over white rice.

American as Apple Pie

To most people, making a pie sounds to hard, and so they don't even try.  Pie is not that hard!  Here is our super easy recipe for Apple Pie.  The same crust will also be used for Chicken Pot Pie.  In fact, when you make the whole pie crust recipe, you will have enough for one full pot pie, and then one more bottom crust.  That is perfect because our apple pie features a crumb topping.   The dough can also be frozen for up to 12 weeks.

Foolproof Pie Crust

  1. 4 C Flour                                                 
  2. 1 T while granulated Sugar
  3. 2 t Salt
  4. 1 3/4 C shortening
  5. 1 T white vinegar
  6. 1/2 C cold water

What to do:

With a fork or pastry blender, mix together flour, shortening, salt and sugar.  In a separate dish, beat egg, vinegar, and water.  Add liquid mixture to dry ingredients stirring with fork  until all are moistened.  Using your clean hands, mold dough into a ball. Wrap in plastic and chill at least 15 minutes.  Dough can be left in refrigerator for up to 5 days.


Apple Pie Filling:

  1. 6 C granny smith apples (you can use any apple but make sure and use a crisp one. Most grocery stores will have an apple guide to help you choose the right apple for your dish.  DO NOT UNDER ANY CIRCUMSTANCE ATTEMPT WITH RED DELICIOUS.)
  2. 3/4 C Sugar
  3. 2 T all-purpose flour
  4. 1/2 t cinnamon
  5. 1/8 t ground nutmeg
  6. 1 T lemon juice

What to do:
Peel, core, and thinly slice apples.  Immediately put lemon juice on apples to prevent browning.  Add sugar, cinnamon, nutmeg and flour.  Mix well.


Crumb Topping:

  1. 1/2 C all-pupose flour
  2. 1/2 C tightly packed brown sugar
  3. 4 T Butter
  4. 1/2 C oatmeal

What to do:
Mix all dry ingredients.  Add melted butter.  mix well.


The Final Assembly!!!

There are many ways to roll out the pie crust, this is the one we have found to work best.  please leave a comment if you have any other ways that work for you.

On a well floured surface, using a rolling pin (or wine bottle, or other cylindrical object if you don't have a rolling pin) roll out 1/3 of the total pie crust until it is about 2-3 inches larger than an inverted pie dish.  Lightly flour the top surface of the pie crust, and fold the crust in half. (It helps to roll in backwards onto the rolling pin. Folding it in half helps in transferring the crust to the dish).  Carefully put the crust into you pie dish and unfold.  Trim the edges of the crust about 1/4 inch past your pie dishes' edge.  Fold the edge of the crust underneath it self, so that it is flush with the pie dishes' edge.  Using your you thumb and index finger make a V shape.  Using your other thumb crimp the edges so the look nice.   Scoop the apples into the pie crust.  You DO NOT want all the juice that is in the apple bowl, it will make it very soggy.  You should have a nice mound of apples.  Top the apples with your crumb topping, and smooth it out.  Bake at 375° for 30 minutes.  If the edges become to brown, you can cover them with a piece of tin foil.  To do this fold a piece of foil into a square, and cut off the corner, unfold and you have a ring.   
Let the pie cool for 5 minutes before you cut. Serve with vanilla ice cream!


Sunday, January 8, 2012

German Pancake

This recipe makes for a great sunday morning breakfast because of how easy it is.  The proportions I will give make a pancake that feeds two, but can easily be multiplied to feed more than two.  If you are going multiply this recipe by more than two, I would suggest cooking it in two dishes.  If you try to much one of two things will happen. 1) It will overflow or 2)  It will not cook enough in the middle.

What you need:
1/2 C Flour
1/2 C Milk
3 Eggs
vanilla extract
nutmeg
cinnamon
1/2 Tbsp Butter

What to do:

1) Turn your oven on to 375 degrees.  Put 1 tbsp butter into an oven safe dish and put in oven to melt while oven preheats.
2) In one bowl combine all dry ingredients and mix them up.
3) combine eggs, milk, and vanilla.  Mix them and add to the dry ingredients.  Wisk together until nearly all the flour chunks are gone.
4) By this time the butter should be melted.  spread the butter over the walls of the baking dish.  pour your mixture into the dish.
5) Bake for about 20-25 or until the edges are a nice golden brown.
Cut and serve.
 (as the food cools, it will fall back into the dish)
We really like it with just cream cheese and maple syrup.  You can top it with whatever you like. Fresh fruit is especially good.


Cheesy Baked Rigatoni

2 1/2 cups uncooked rigatoni pasta
1/2 lb uncooked mild Italian pork sausage
3 cloves garlic
1 can crushed tomatoes, undrained
3 teaspoons dried basil
1 Cup shredded parmesan cheese
2 1/2 cups shredded mozzarella cheese


What to do:
1) Cook the pasta a little under what the cooking time on the box directs.  It will continue to cook in the oven, and if you cook it just how you like it in the boiling water, it will be overcooked.
2) In a skillet, cook the sausage till it is no longer pink, drain any fat and set aside.
3) While the pasta and sausage are cooking, in a medium bowl, combine the tomatoes (with their liquid), basil, and the garlic that you have previously peeled and chopped (or crushed).
4) Spray a 9x13 glass cooking dish with non-stick spray.  In the dish layer half each of the pasta, sausage, mushroom (if you like to eat fungus), red pepper if you like them, Parmesan cheese, tomato mixture and mozzarella cheese.  Repeat layers. 
5)  Bake uncovered at 375 degrees for 35-40 minutes or until the mixture is hot and the cheese is golden brown.